Overview: Learn, How to Export Office 365 Mailboxes to PST using different methods. Also, find the best-automated method to export.
A user working in an organization will receive and send a large number of emails throughout the day. Some emails could be very important for the users and need to be extracted for safety purposes which can be accessed easily without an internet connection. Therefore it is very important to know How to Download Office 365 Emails to PST. So that the user has important backup data saved even if some error occurs in the future.
Why Export Office 365 Mailboxes to PST File Format?
There are many reasons for a user to export Office 365 mailboxes to PST file format.
Some of the reasons are mentioned below:
- The backup files can help restore emails and other data files in case of data loss.
- Having full control of your data and not depending on Microsoft.
- Prevent unintentional deletion of data and cyberattacks.
- If we export Office 365 mailboxes to PST, then the user can save Office 365 mailboxes to the local drive for any further use and access it without an internet connection.
- Keep your files and documents for a long period of time.
- PST files are useful and easy to transfer from one computer to another.
Method 1. Export Office 365 Mailboxes to PST using eDiscovery
Step 1. Log in to the Admin Center of Office 365 using your Office 365 admin account.
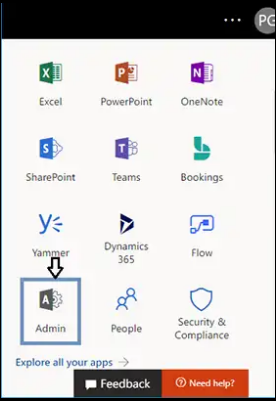
Step 2. Go to Admin Centers and navigate Security & Compliance.

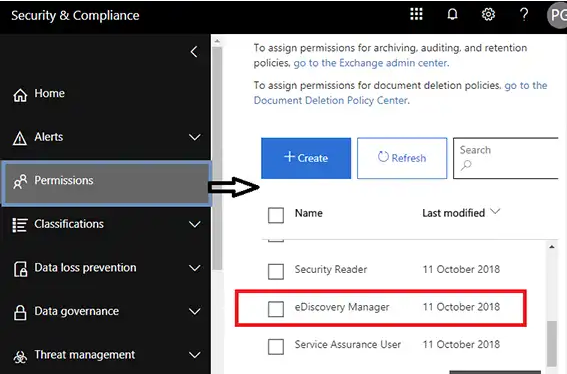
Step 3. From the Security & Compliance window, Click Permissions
- Scroll down and find eDiscovery Manager.
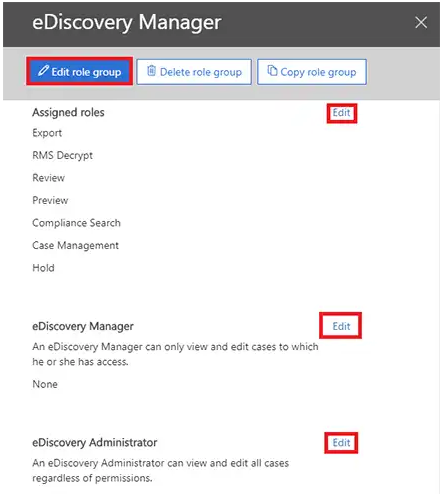
Step 4. Select eDiscovery Manager and click on Edit role group.
- By default, the roles assign are ( Export, RMS Decrypt, Review, Preview, Compliance Search, Case Management, and Hold). For some reason, if the Export option is not there go to edit and add the Export role.
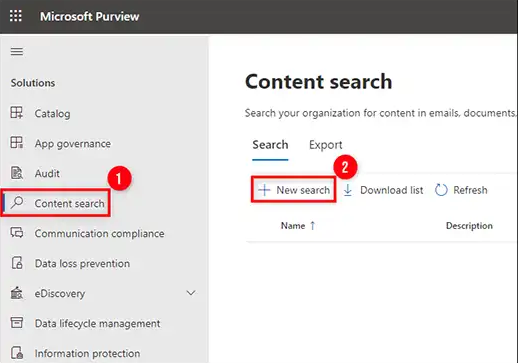
Step 5. Now, navigate to the Microsoft Purview window and Select Content Search > +New Search.
Step 6. After clicking on New Search, a new window will appear. This will allow you to custimoze all content search options. Users can enter their Name and description, Locations option will allow you to select any specific locations from ( Exchange, SharePoint, or Exchange Public) and the specific mailbox that you want to export.

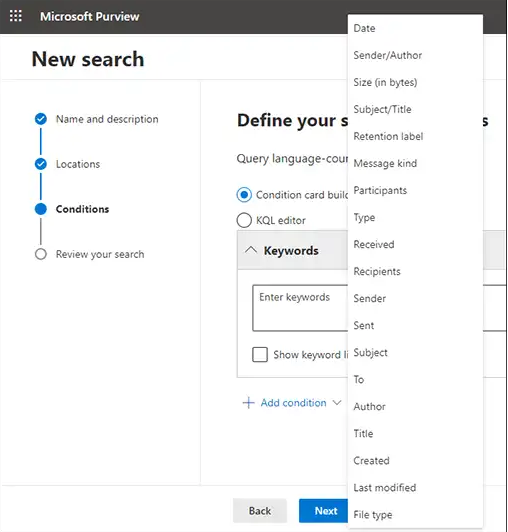
Step 7. Now select Conditions and ADD Filters. Some of the filters are Date, Sender, Size, Subject, Retention label, Message kind, Participants, Type, Received, Recipients, Sender, etc.
Step 8. After applying the required filter, Click Next.
Step 9. Now the process starts running and users can check the status by clicking the search.

Step 10. Select the file and click Action and select the Export results.

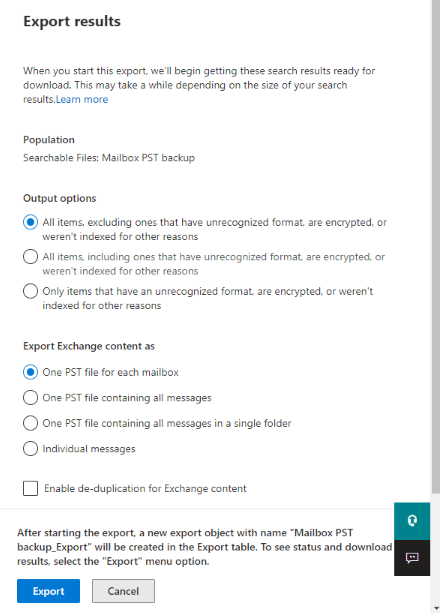
Step 11. From this window, you can choose the output options if you want to include or exclude the encrypted items or you can select options from the Export Exchange content. After finishing Click Export.
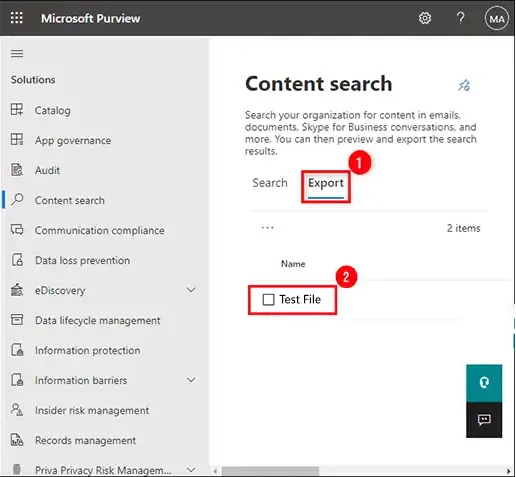
Step 12. After clicking on export, Select the search file to check the status.
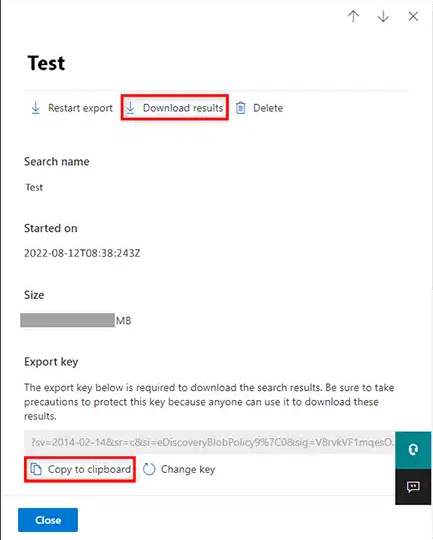
Step 13. When the export process is completed, copy the Export Key by clicking on copy to clipboard. Then click on Download Results.
Step 14. After downloading, eDiscovery Export Tool will appear. Paste the Export Key here and set the Browse option where you want to save the PST file.
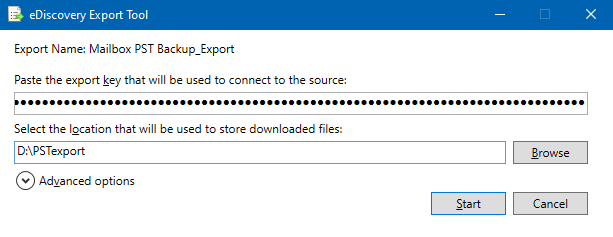
Click the START button to start the Office 365 to PST process.
Limitations of the eDiscovery Method
- Failed Exporting Item Error due to corrupted items in search content.
- Working with a huge amount of data can cause an eDiscovery crash error.
- The Export Key needs to be secure safely, anyone with the key can download the PST file.
- The user must have technical skills to perform this method.
- This method only works with Internet Explorer or Microsoft Edge browser, if you want to work this with Google Chrome or Mozilla Firefox user needs to add the OneClick extension.
Method 2. Export Office 365 Mailboxes to PST files in Outlook
Step 1. Open the Outlook application and Login with your Office 365 account.
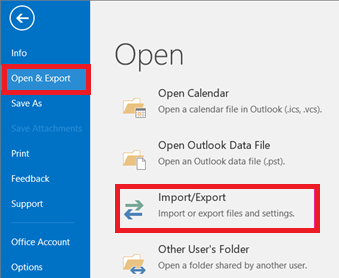
Step 2. Now go to File Option > Open & Export > then select Import/Export.
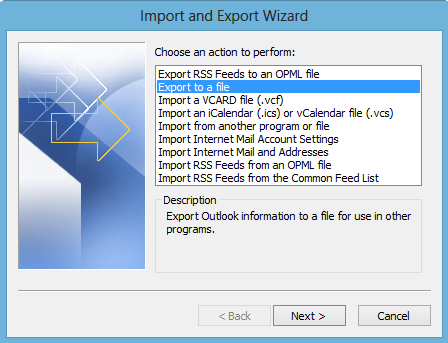
Step 3. From Import and Export Wizard Window Select the “ Export to a file” option and click Next.
Step 4. In the Export Outlook Data File Window select the Name of Email and the folders and subfolders.

Step 5. Select Browse Option and provide the destination of the PST files.

Step 6. Click Finish.
Limitations of using the Manual Method
- It allows one account to export at a time.
- Oversized files make the exporting process slow and time-consuming.
- Unable to export entire data such as Emails, Calendars, Tasks, Contacts, etc.
- Multiple folder selections are not allowed in the manual method.
Method 3. Export Office 365 to PST using Automated Tool
A user can export Office 365 and PST using manual methods which are mentioned above. Even though the manual methods are free to use but they have a complex process and users need technical knowledge to perform them. To overcome all these limitations we recommended SysTools Office 365 Export Tool.
Features Provided by Automated Tool are:
- Admin and User both can log in and further access the Export Tool.
- Extract Office 365 mailboxes to different file formats ( PST, EML, MSG).
- Also allow choosing the Category ( Emails, Calendars, Tasks, Contacts) options.
- Date Filter option to export mailboxes of a specific time interval.
- Export Shared and In-Place Archive mailboxes.
- Pause and Resume option available.
- Save the report in CSV format after the complete process.
Software Steps to Export Office 365 to PST
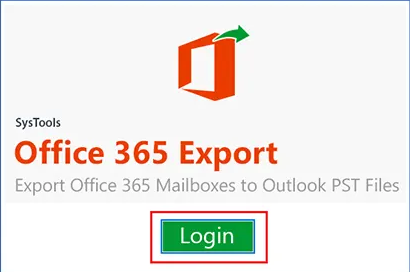
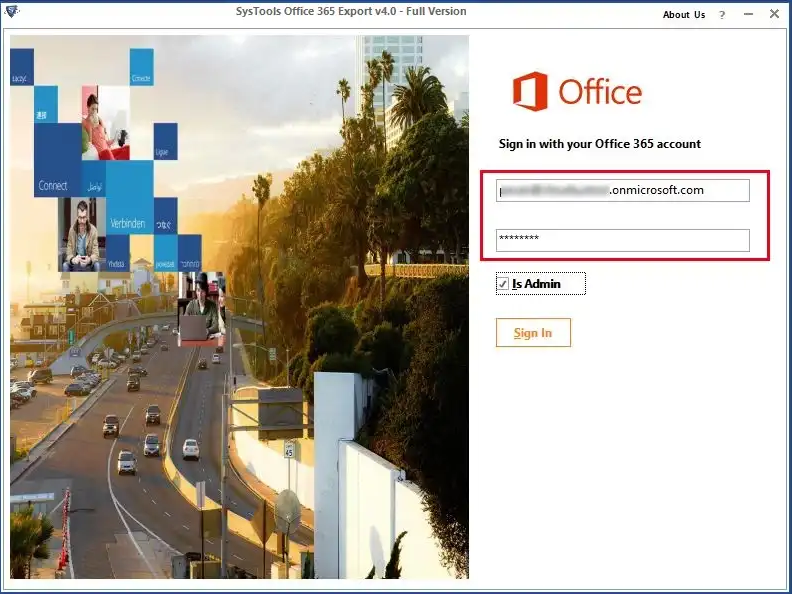
Step 1. Download and run the software. Click Login.
Step 2. Enter Admin/User credentials. Click on Sign In.
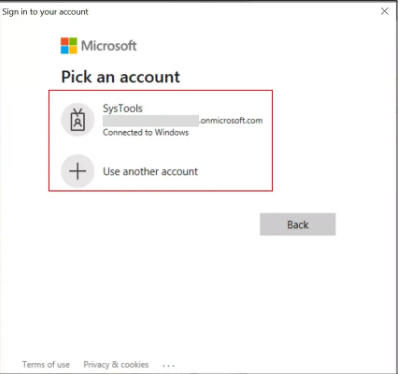
Step 3. After Signing in, a dialog box will open, and click OK.

- Pick a recent Loggin account or add a new account.
Step 4. All user IDs will be displayed under the admin account. Select the required users and click Next.

Step 5. Select the file format Microsoft Outlook (PST), and after that select, the checkbox Split Outlook Data File After and select the PST file size.

Step 6. From the Category options select ( Mails, Calendars, Tasks, Contacts, and Archive Mailbox ).
- Set a Date Filter to export mailboxes of a specific time period.
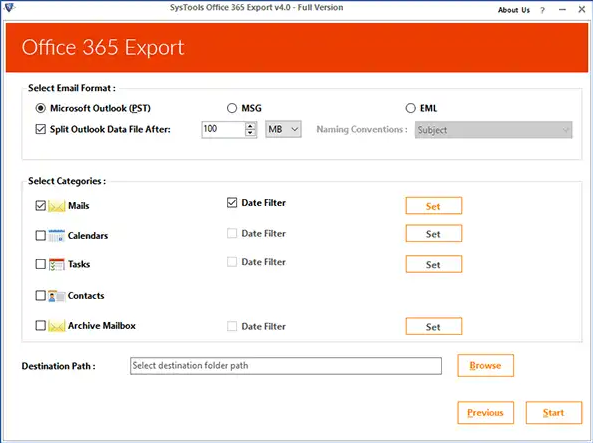
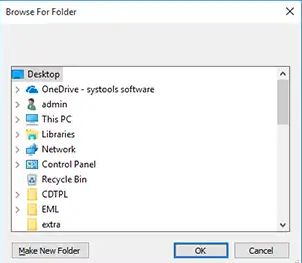
Step 7. Select Destination Path by clicking on Browse
Now Click on Start to start the Export Process.
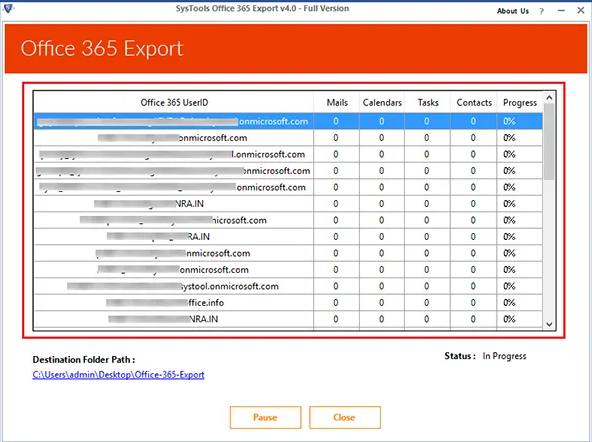
Step 8. The process will start now.
Step 9. After the process is completed successfully, Click Save Report to save the PST file.

Conclusion
Users can Export Office 365 to PST using the manual method or automated method. Although the manual method is free of cost and very complex at times. The process is time-consuming, also users need technical skills to perform the manual method. It can also lead to many drawbacks which could result in data loss and file corruption. Hence, the best way to perform the export is to use an automated method that is less complex and easy to use.